-
[Push] 0. Apple Push Notification service (APNs) 와 작동방식/Push Notification 2023. 7. 23. 14:54반응형
2. FCM으로 사용하는 방법을 알아보자.
3. FCM 없이 사용해보자.
4. 환영해요 ! Push Notification Console
안녕하세요 ! 아렉스입니다
iOS 앱에서 Push Notification 기능은 매우 보편적으로 사용되고있습니다.
Push Notification Service에 대해서 알아보겠습니다.
APNs 란 ?
Apple Push Notifications Service의 줄임말로서
푸시 알림 전달을 가능하게 하는 백엔드입니다
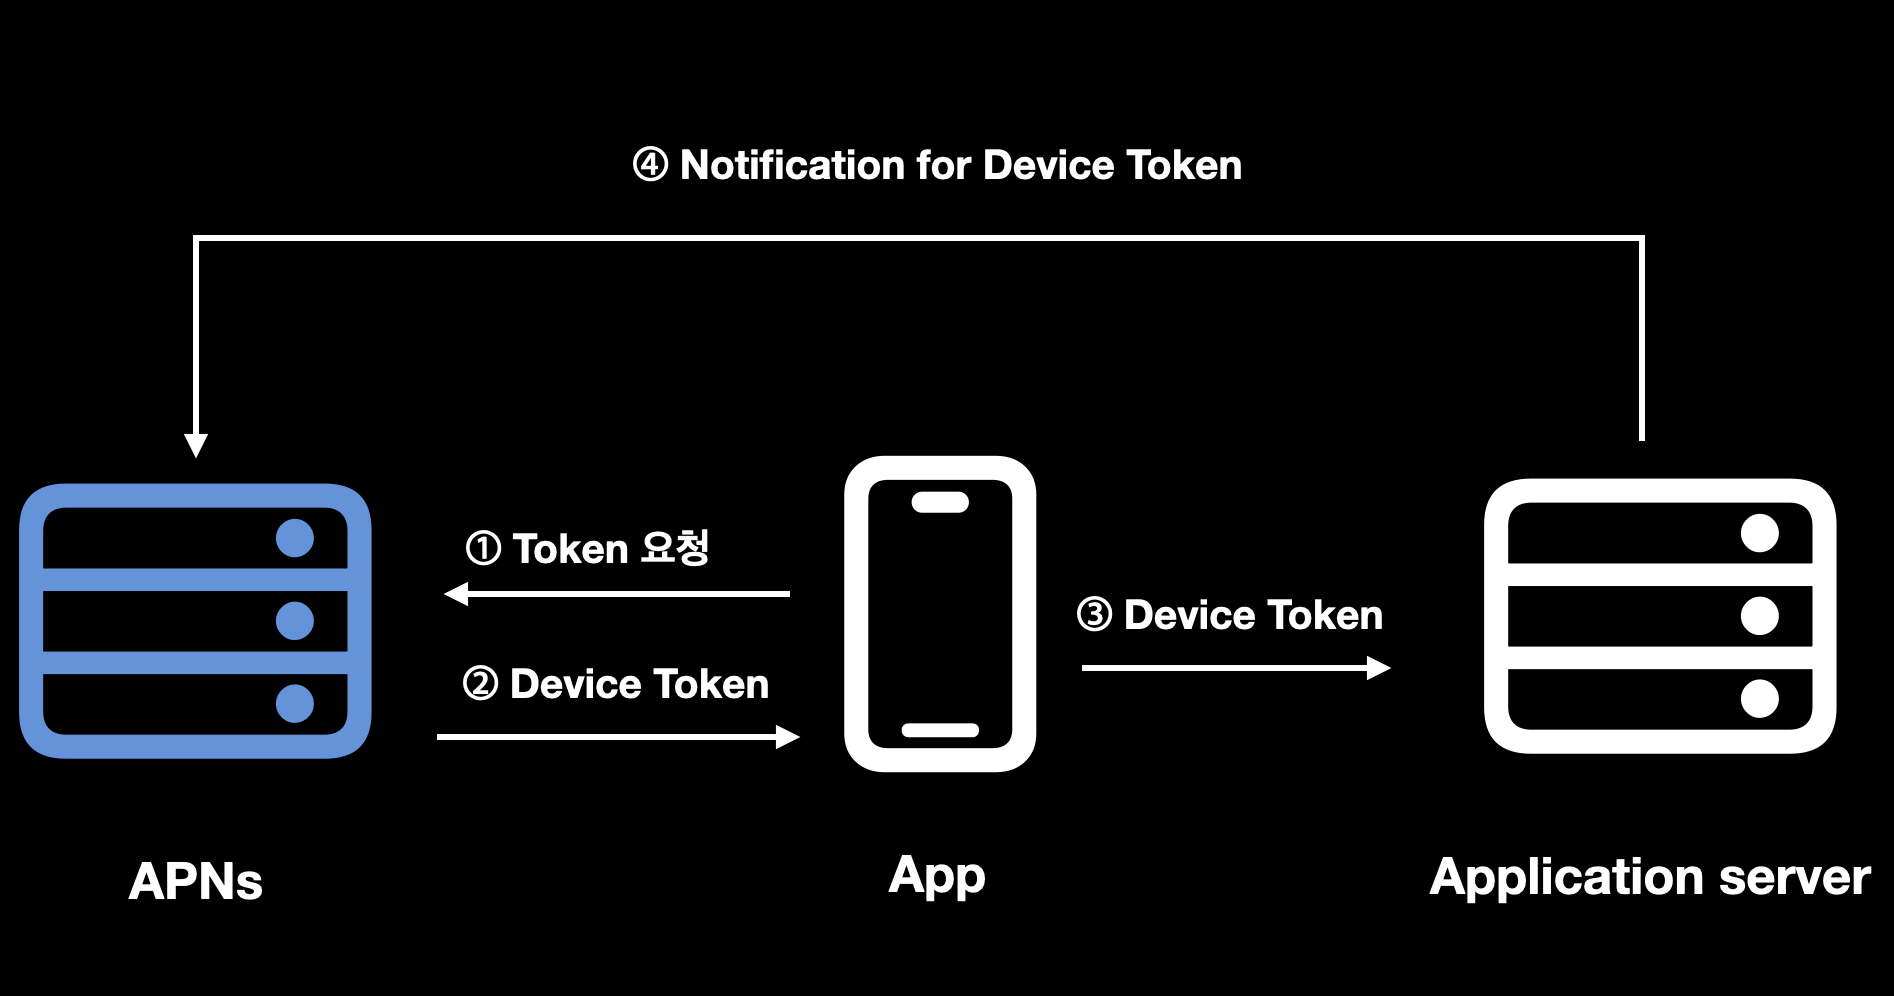
APNs 작동방식
1. 알림에 대한 권한 요청이 승인이 된 경우 디바이스가 APNs에 토큰을 요청
2. APNs 에서 디바이스로 토큰을 전달
3. 디바이스에서 APP의 Server로 토큰을 전달
4. App의 Server에서 APNs로 요청5. APNs가 디바이스로 알림 전달

디바이스에 알람이 전달 되는 과정을 이렇게 정리해볼 수 있었습니다.
APNs 를 사용하기 위한 선행 작업
⚠️ Apple Developer 계정이 필요합니다.
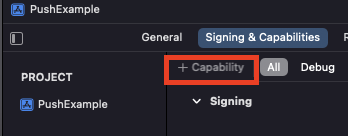
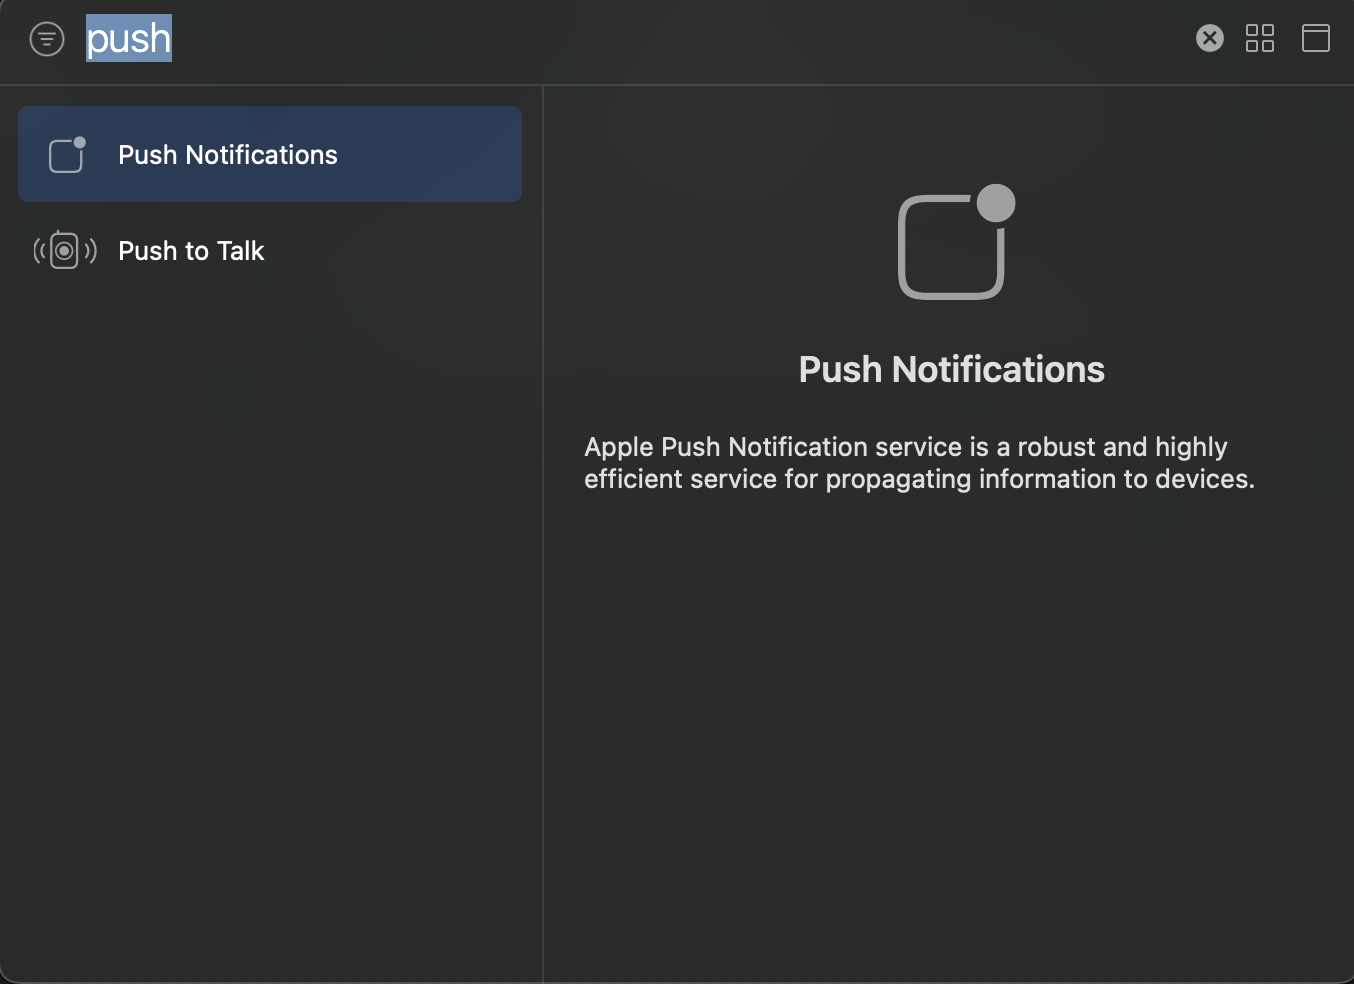
1. 프로젝트에 Push Notification Capability 추가
2. APNs 인증수단 등록 (인증서 or 토큰)
3. App에서 Remote Notification 등록하기
프로젝트에 Push Notification Capability 추가


Remote Notifications 등록하기
프로젝트에 Push Notification capabillity를 추가했다면,
remote Notifications 을 사용을 하기위해서는 APNs 에 등록해줘야합니다.
// 1.  remote Notifications 에 등록하기 !
func application(_ application: UIApplication,
								didFinishLaunchingWithOptions launchOptions:
								[UIApplication.LaunchOptionsKey: Any]?) -> Bool {
	// APN에 장치가 등록이 되고 응용프로그램에 장치 토큰이 반환
	UIApplication.shared.registerForRemoteNotifications()

    // UNUserNotificationCenterDelegate은 alert notifications 처리할 때만 사용
	// UNUserNotificationCenterDelegate 채택해야함 !
	// 이렇게 해야 푸시 왔을 때 application에 알릴 수 있음!
	UNUserNotificationCenter.current().delegate = self

	return true
}
registerForRemoteNotifications() 메소드를 호출하여 등록을 성공 했나요 ?!
그렇다면 registerForRemoteNotifications() 메소드 호출에 대한 콜백 처리를 해주어야합니다.
// registerForRemoteNotifications 에 대한 콜백 두 가지
// 장치에 대한 토큰을 가져오지 못한 경우 등록 실패 이류를 설명하는 오류와 함께 해당 메소드가 호출
func application(_ application: UIApplication,
								 didFailToRegisterForRemoteNotificationsWithError error: Error) {
		print("원격 노티피케이션 사용불가 !! : \(error.localizedDescription)")
}

// 토큰을 받는데 성공한 경우, 이 장치에 알림을 전달할 수 있도록, 해당 토큰을 백엔드 푸시 서버로 보내야함
func application(_ application: UIApplication,
								 didRegisterForRemoteNotificationsWithDeviceToken deviceToken: Data) {
    forwardTokenToServer(token: deviceToken)
}

func forwardTokenToServer(token: Data) {
    // 서버로 보내려면 문자열로 변환해야함
    // 16진수 문자열로 변환한 다음 다시 결합하여 단일 문자열로 만들 수 있다.

    let deviceTokenString = token.map { data in String(format: "%02.2hhx", data) }.joined()
    print("deviceTokenString: \(deviceTokenString)")

    // 서버로 보내 데이터베이스에 등록 !
}
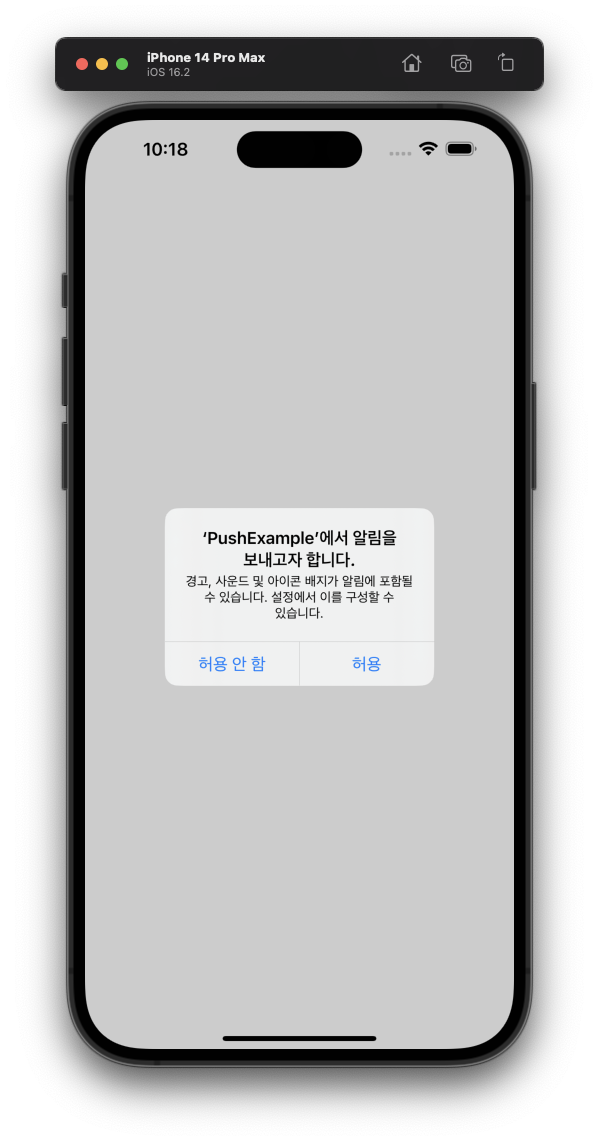
등록, 콜백 처리까지 되었다면, 이제 우리는 유저에게 알림에 대한 권한을 요청을 해야겠죠 ?
let center = UNUserNotificationCenter.current()
center.requestAuthorization(options: [.alert, .sound, .badge]) { granted, error in
    if let error = error {
        print(error.localizedDescription)
    }
        print("Permission granted: \(granted)")
}
출처
What's New in the Apple Push Notification Service
' > Push Notification' 카테고리의 다른 글
FCM을 통한 Push Notification 서비스 - 1 프로젝트 생성, 설정 (0) 2023.11.23 [Push] 4. 환영해요 ! Push Notification Console (1) 2023.07.23 [Push] 3. FCM 없이 사용해보자. (0) 2023.07.23 [Push] 2. FCM으로 사용하는 방법을 알아보자. (0) 2023.07.23 [Push] 1. .p12 인증서와 .p8 인증키 차이 (0) 2023.07.23